Search Blog
Recent Posts
-
 Best Practices for Pricing...
Master pricing for composite products in PrestaShop. Explore dynamic, component-based strategies to increase...
Mar 13, 2026 Read more
Best Practices for Pricing...
Master pricing for composite products in PrestaShop. Explore dynamic, component-based strategies to increase...
Mar 13, 2026 Read more -
 Cross-Selling & Upselling...
Learn how PrestaShop merchants can leverage composite products for effective cross-selling and upselling. Guide...
Mar 12, 2026 Read more
Cross-Selling & Upselling...
Learn how PrestaShop merchants can leverage composite products for effective cross-selling and upselling. Guide...
Mar 12, 2026 Read more -
 How to Create Composite...
Learn how to set up composite products in PrestaShop. This guide covers multi-component items, conditional logic,...
Mar 11, 2026 Read more
How to Create Composite...
Learn how to set up composite products in PrestaShop. This guide covers multi-component items, conditional logic,...
Mar 11, 2026 Read more -
 Composite Products vs...
Learn about composite, bundle, and configurable products in PrestaShop, and see how their features, customization...
Mar 11, 2026 Read more
Composite Products vs...
Learn about composite, bundle, and configurable products in PrestaShop, and see how their features, customization...
Mar 11, 2026 Read more -
 How A PrestaShop Product...
Learn how PrestaShop product builders streamline admin setup and customer workflows, allowing shoppers to customize...
Mar 9, 2026 Read more
How A PrestaShop Product...
Learn how PrestaShop product builders streamline admin setup and customer workflows, allowing shoppers to customize...
Mar 9, 2026 Read more
PrestaShop Events Calendar in Adore: Easy Setup Guide
Posted On: Aug 4, 2023
Categories: Marketing , Best Modules
PrestaShop Events Module is a useful tool that is developed for helping store merchants to create events in their stores. It allows store managers to strengthen their marketing strategy by creating a multitude of events to boost revenues and sales. Each event can be carried as a promotional campaign to attract customers, engage them into fun-loving activities, and make them sign-up for the events either by buying tickets or ordering related products. it comes with the valuable features that include:
- Create unlimited events on your PrestaShop Store
- Display all the events in a Calendar view
- Attach tickets to sell on events pages
- Manage and display all the events on a dedicated page
- Add Google map location to navigate users to event’s venue
- Enrich events page with photos and videos
- Configure SEO settings to maximize events exposure
- Enable social share buttons to gain social signals
Maximizing store revenues has never been easier without PrestaShop events module. The tool provides you with the advanced functionality of creating events that your local or global audience will love to participate in. To engage the local community, different activities can be arranged to celebrate Christmas, New Year, etc. however, to gain attention to the multiregional audience, virtual events can also be created to boost sales with coupons, discounts, and lots of other discount forms.
How to set up the PrestaShop Events Calendar Module?
Here is a step by step guide for you to install and configure the module in your store.
Step 1: Download PrestaShop Events Calendar Module first and login to your PrestaShop store’s admin panel.
Step 2: Navigate to the Modules section on the left-side of the menu and click ‘Upload a Module.’
Step 3: Proceed with the installation by uploading the files you have downloaded in the first step. Once the installation completes, move to its configuration.
Step 4: Configure PrestaShop Events Calendar Module. It comes with detailed configurations settings like:
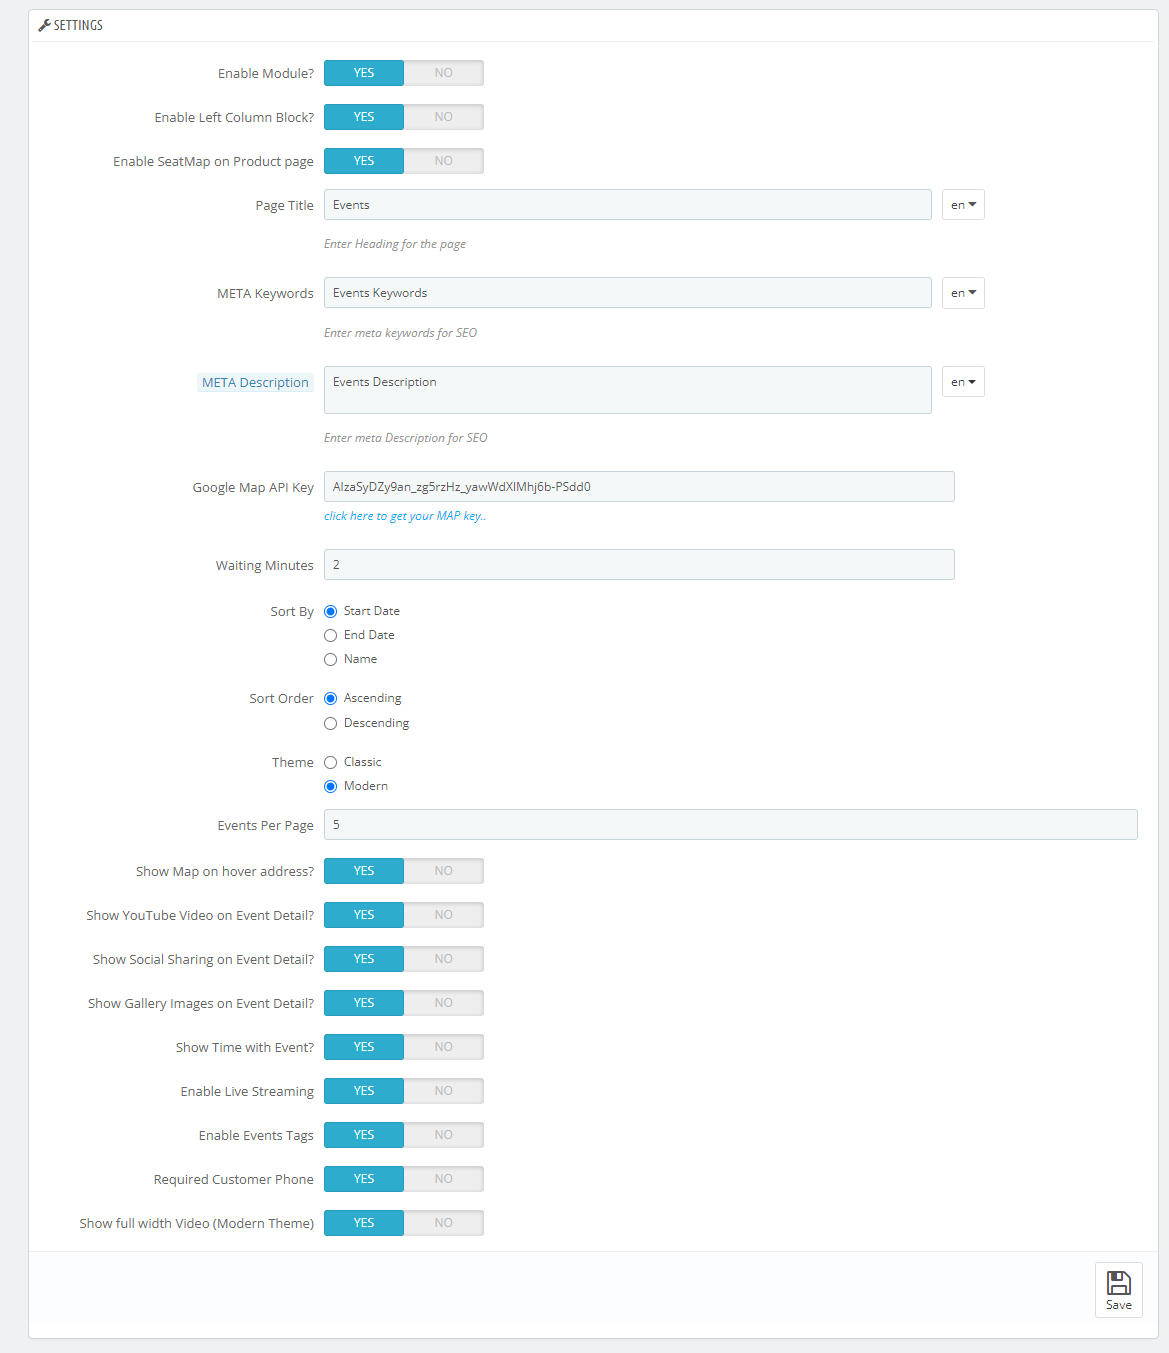
- Enable module
- Enable left column block
- Enable Seat Map on product page
- Add Meta title, descriptions, and keywords for events page
- Configure Google Map API
- Sort events in ascending or descending order by name or date
- Choose classic or modern theme for it
- Enter number of events to show
- Enable different display settings
- Map on mouse hover
- YouTube video of event’s page
- Social sharing
- Gallery images
- Time
- Enable live streaming
- Enable events tags
- Require customer phone for events booking
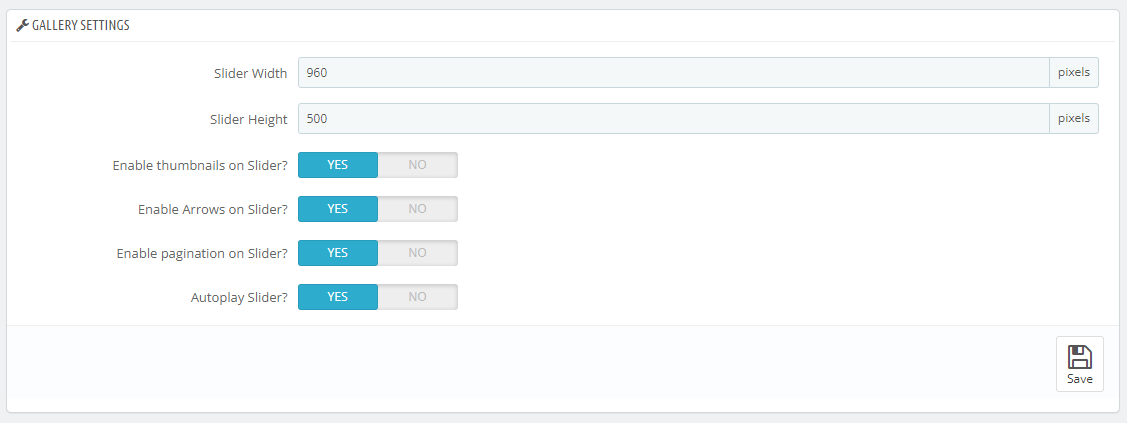
Step 5: Continue with the configuration settings with image settings. Enter slider width and height.
Step 6: Upon enabling the module in configuration, you will find an additional section in the control panel named Events. Check it and click ‘Manage Events.’
Step 7: Click the plus sign above the events listings to create an event. It will take you to a detailed page with different sections. Start with the general information that includes:
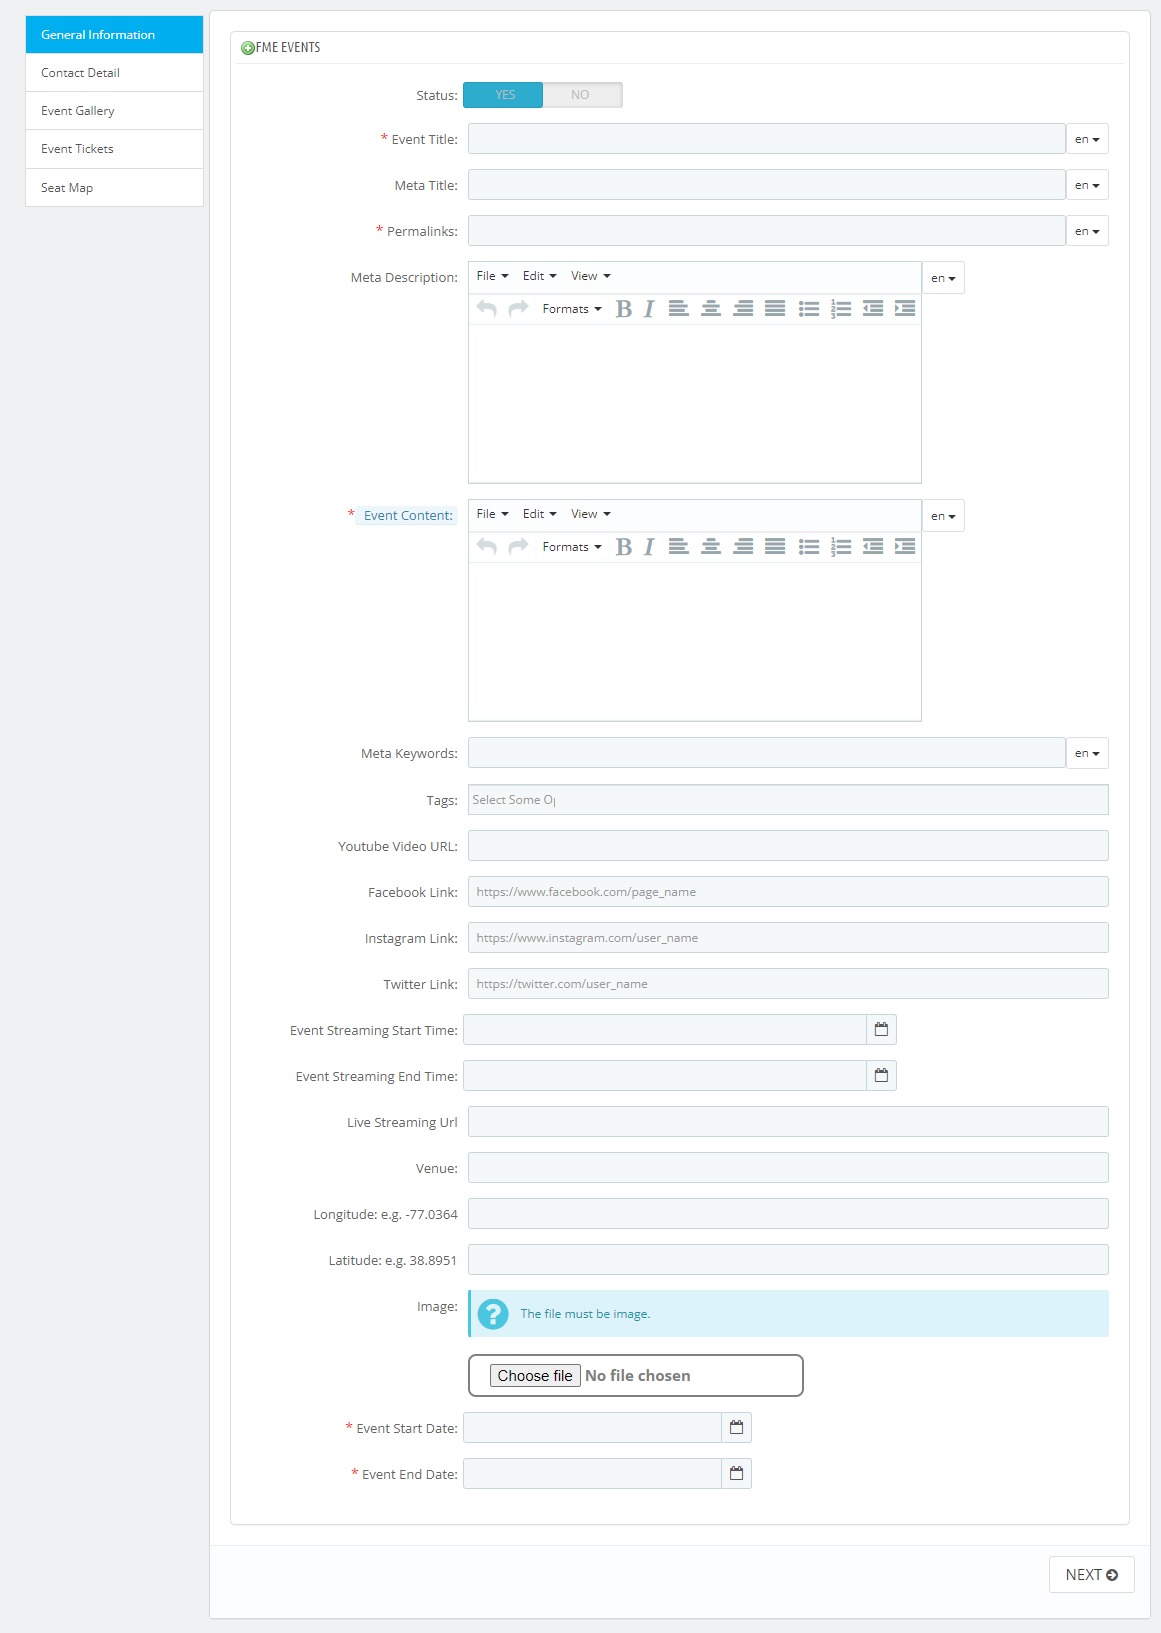
- Add event title, meta title, meta description, keywords and permalink
- Write a detailed description of the event
- Enter event tags
- Provide links to YouTube, Facebook, Instagram, Twitter
- Enter start and end time of event streaming with URL
- Add venue details with map location
- Upload an image to event
- Schedule the event
Step 8: Click ‘Next’ to fill Contact details. It Includes:
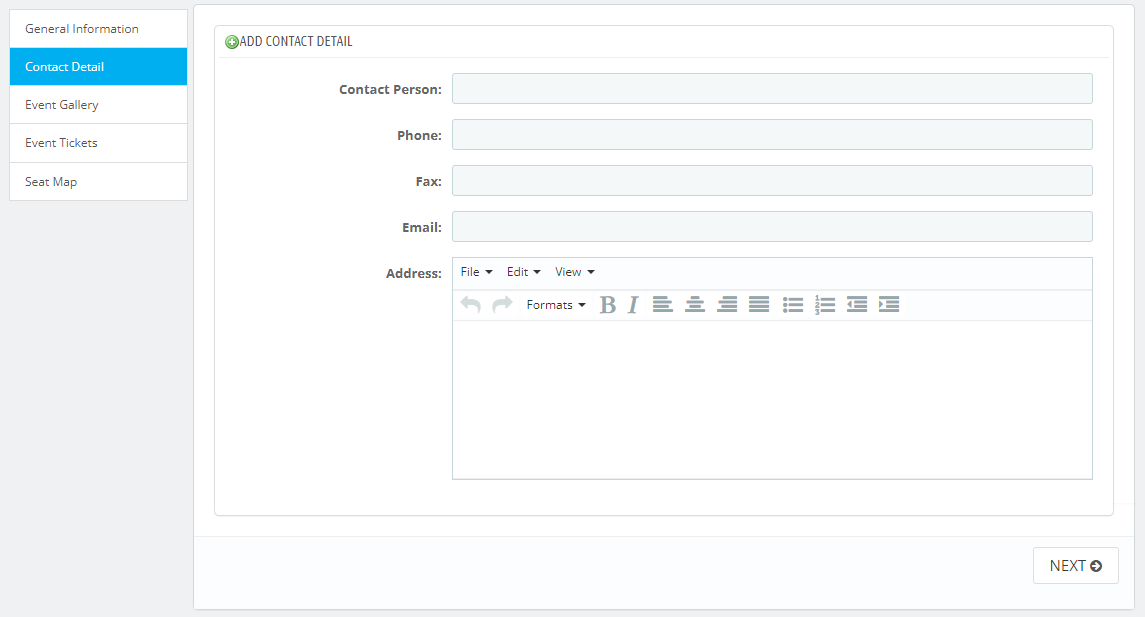
- Contact person name
- Phone number
- Fax number
- Address
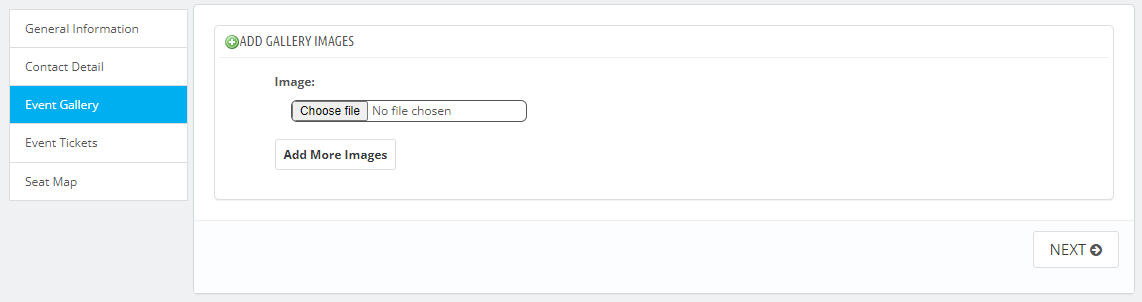
Step 9: Click ‘Next’ to create an image gallery. The module allows you to upload multiple images to an event and display it as a gallery. Provide more visuals to make the event more captivating.
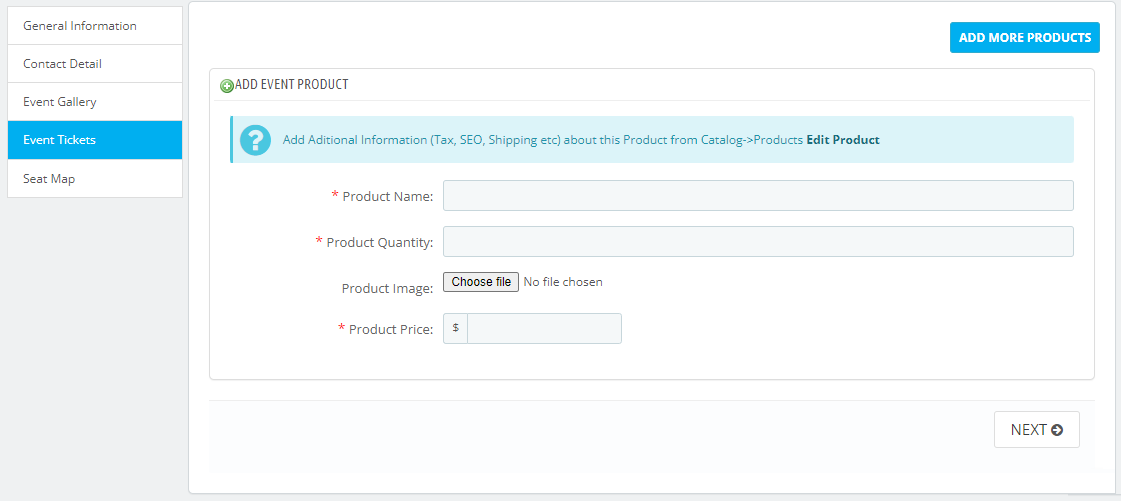
Step 10: Move to ‘Event Tickets.’ Here, you can attach products as tickets to make money out of the event reservations. Write product name, quantity, image, and price.
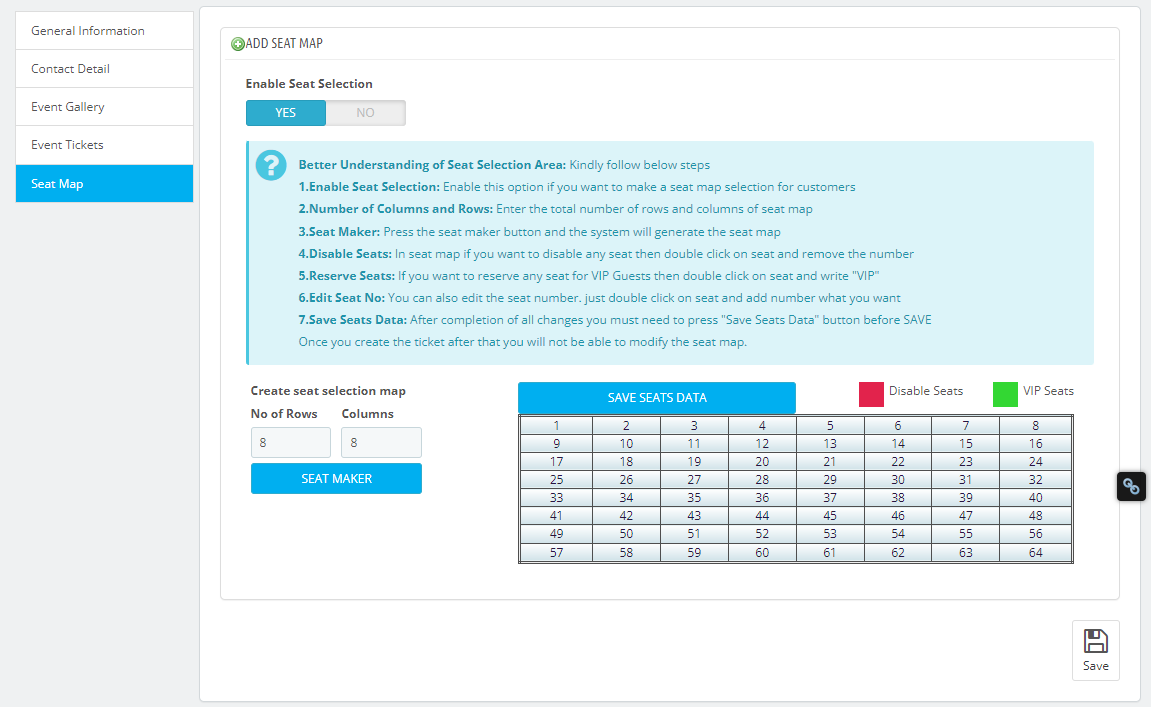
Step 11: Continue with the Seat map settings. Enable it to allow customers reserve seats for the events too. Enter the number of rows and columns to display available seats and save the data.
Step 12: Click “Save” and the event is added. It will automatically appear on the calendar according to the specified date and time.
Step 13: To create additional events, repeat the same procedure. The more events you create, the more opportunities you get to promote catalog items, boost sales, grow user base, and gather an engaged community around your PrestaShop store. The module gives you complete freedom to create or delete any event.
Step 14: Upon creation of each event, you need to review the front-end of your store and check if these are appearing as it needs to be or not. To have a more clear view of how the calendar view works, you need to login as a consumer and test each option. Once satisfied, you are good to go with strategy implementation and target different events.

Conclusion
With the PrestaShop Events Module now, you can effortlessly manage and showcase events to enhance customer engagement and drive conversions. By following this step-by-step guide, you have taken a significant step toward creating a vibrant and interactive e-commerce platform that keeps customers informed and excited about your brand's activities.
Take advantage of the event marketing strategy by forming a variety of events to increase customer engagement in your store and their participation in different activities. By assigning products such as tickets and other catalog items, you can compel users to convert into your customers.
You can plan more intuitive and productive events as it will lead a positive message among your store’s community, and bring in more customers by word of mouth, which is effective and a natural method of marketing.