Search Blog
Recent Posts
-
 7 Essential Factors for...
This blog is all about guiding the readers to choose the right ecommerce shopping cart system for your stores. In...
Apr 19, 2024 Read more
7 Essential Factors for...
This blog is all about guiding the readers to choose the right ecommerce shopping cart system for your stores. In...
Apr 19, 2024 Read more -
 Crafting the Best...
This blog emphasizes the importance of SEO strategies in maximizing the success of e-commerce websites. The...
Apr 17, 2024 Read more
Crafting the Best...
This blog emphasizes the importance of SEO strategies in maximizing the success of e-commerce websites. The...
Apr 17, 2024 Read more -
 The Role of Push...
PrestaShop is a superhero for online stores, simplifying setup while emphasizing the importance of communication....
Mar 5, 2024 Read more
The Role of Push...
PrestaShop is a superhero for online stores, simplifying setup while emphasizing the importance of communication....
Mar 5, 2024 Read more -
 The Business Case for...
B2B modules are essential for businesses navigating the high-tech world of ecommerce. Serving as behind-the-scenes...
Feb 23, 2024 Read more
The Business Case for...
B2B modules are essential for businesses navigating the high-tech world of ecommerce. Serving as behind-the-scenes...
Feb 23, 2024 Read more -
 Improving Brand Loyalty:...
PrestaShop mobile app serve as superheroes, forging lasting connections beyond mere transactions, turning shopping...
Feb 16, 2024 Read more
Improving Brand Loyalty:...
PrestaShop mobile app serve as superheroes, forging lasting connections beyond mere transactions, turning shopping...
Feb 16, 2024 Read more

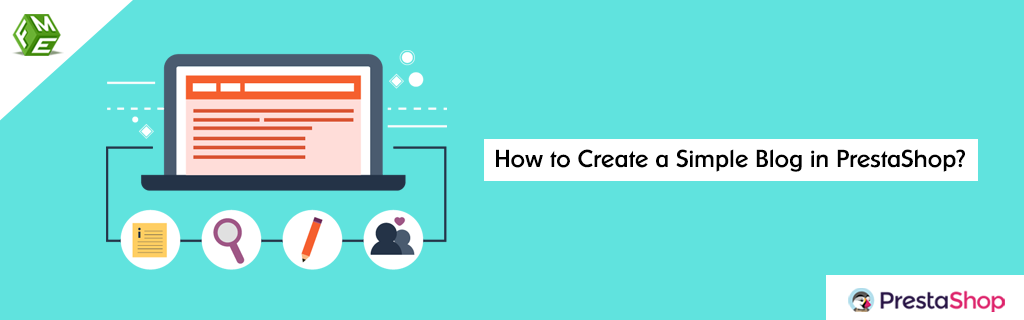
How to Create a Simple Blog in PrestaShop?
Posted On: Nov 27, 2019
Categories: Prestashop 1.6
Blogging helps you transform your products and company name into a renowned brand by sharing authoritative, well researched, interactive, engaging and educational content. Most of the retailers, who are not concerned with quality, do not bother to educate their customers in wake of losing them. You can leave them behind by promoting quality traits of different products more openly on your blog.
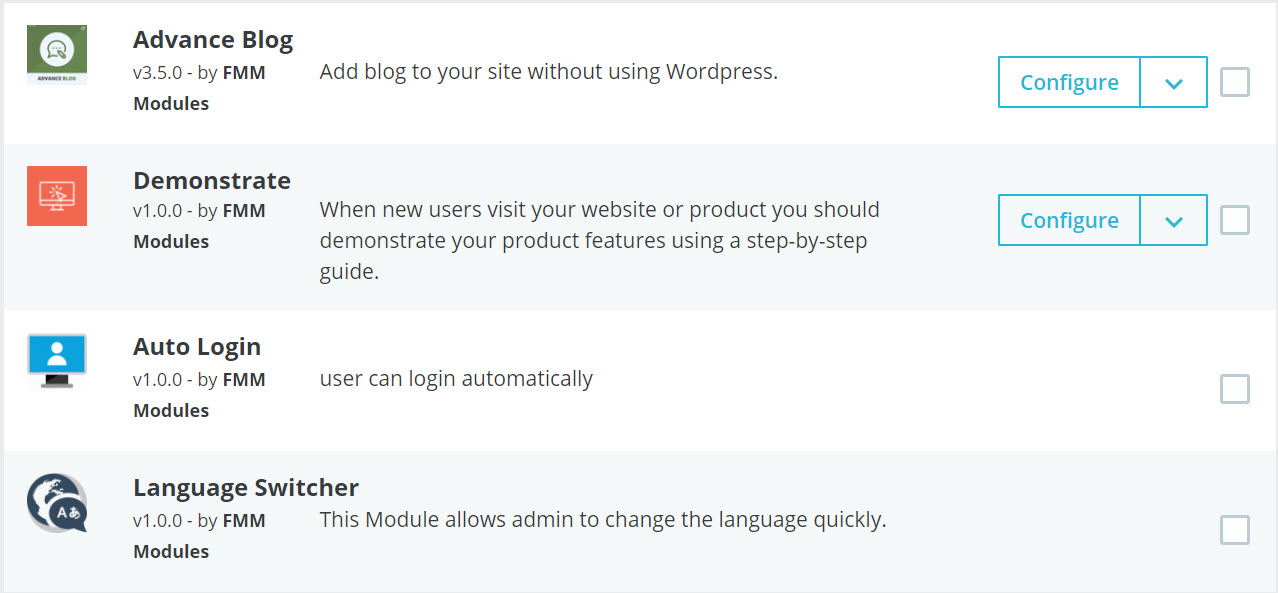
For creating a blog in PrestaShop, you can use free tools with limited functionality which may allow you to start publishing articles for now, but may fail to meet your needs as your progresses in blogging. For peace of mind right from the first day till an authority blog, we recommend the installation of Advance PrestaShop blog module. Follow the tutorial for a quick review of creating a blog with the help of this module.
Step 1: Download and install the plugin. Find Advance Blog in the modules section and click ‘Configure’
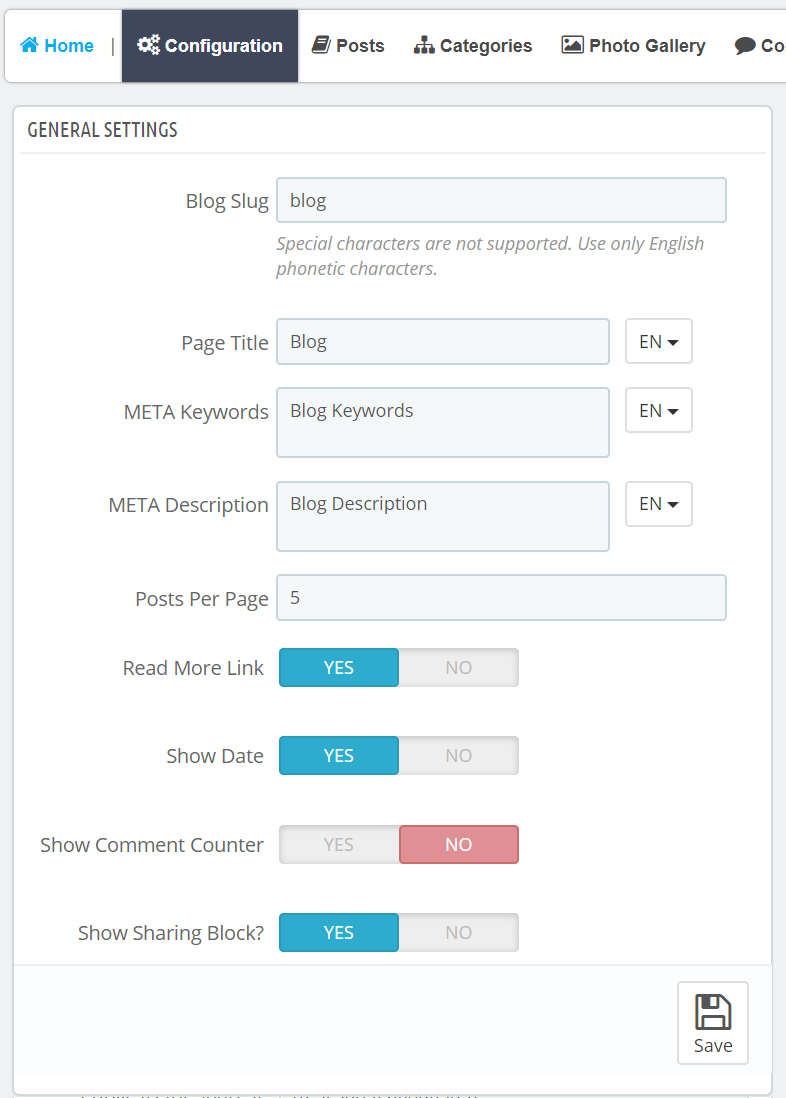
Step 2: Configure blog settings e.g. Selecting a layout, adding a custom title and Meta details, etc. You can enable a read more link, display publishing date, comment counter, social sharing block, etc.
Step 3: Right after blog settings, move on to blog detail settings. After that, you can set preferences for comments, recent blogs block and categories block. 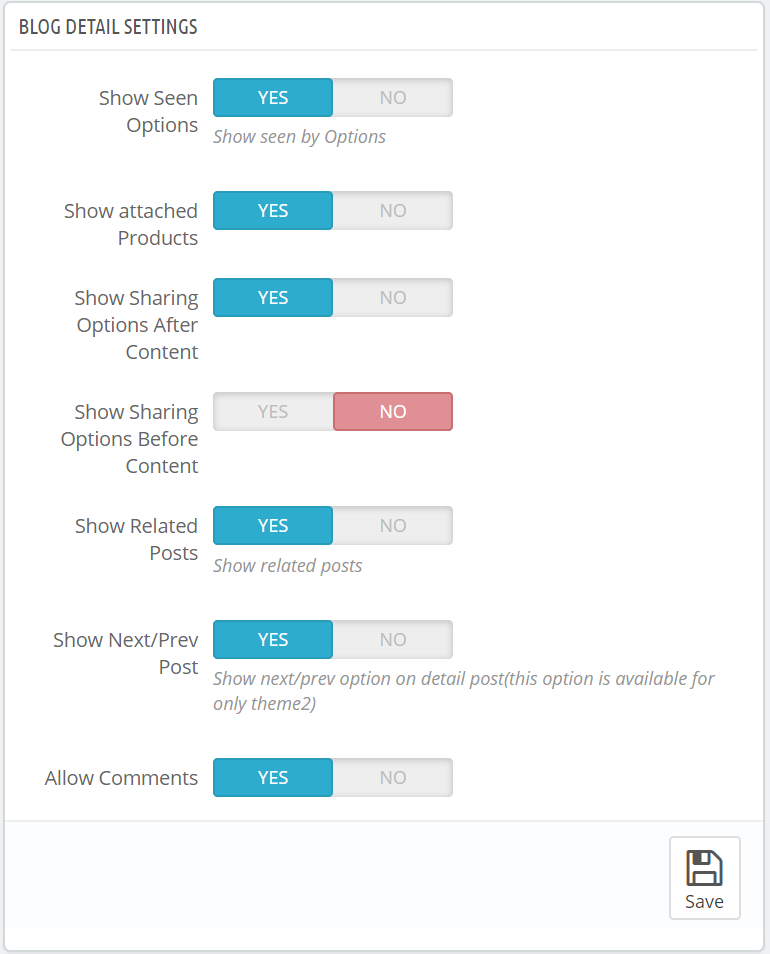
Step 4: Further, the configuration settings extends to blog search block, archives, blog tabs on products, and recent comment block. 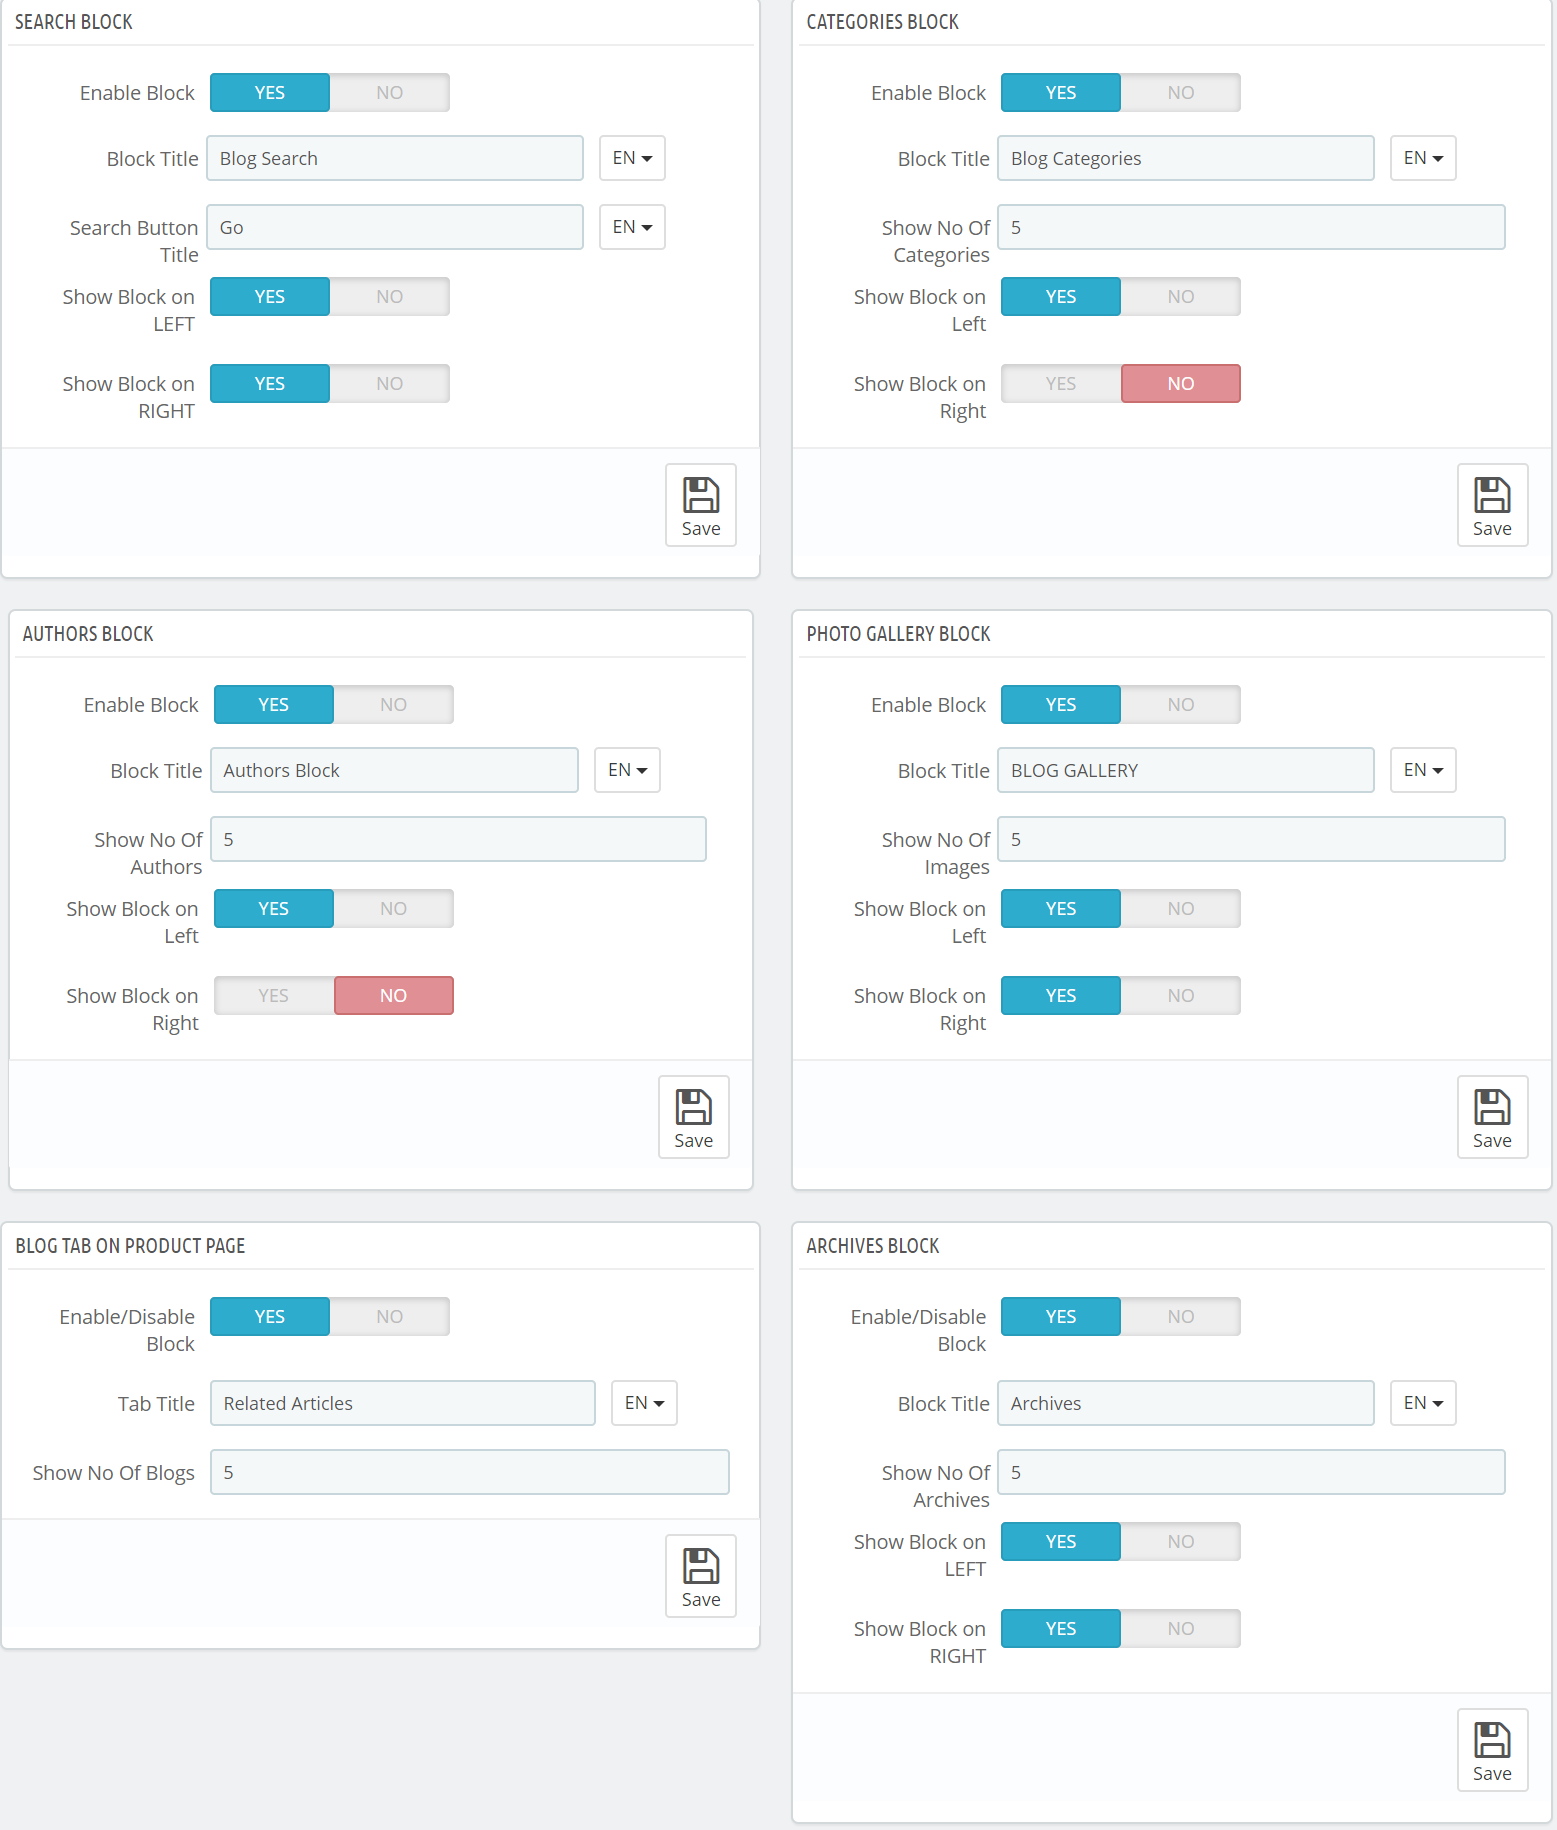
Step 5: After configuration settings, click on Categories option. Here, you can view, edit and create categories for the classification of articles and posts. 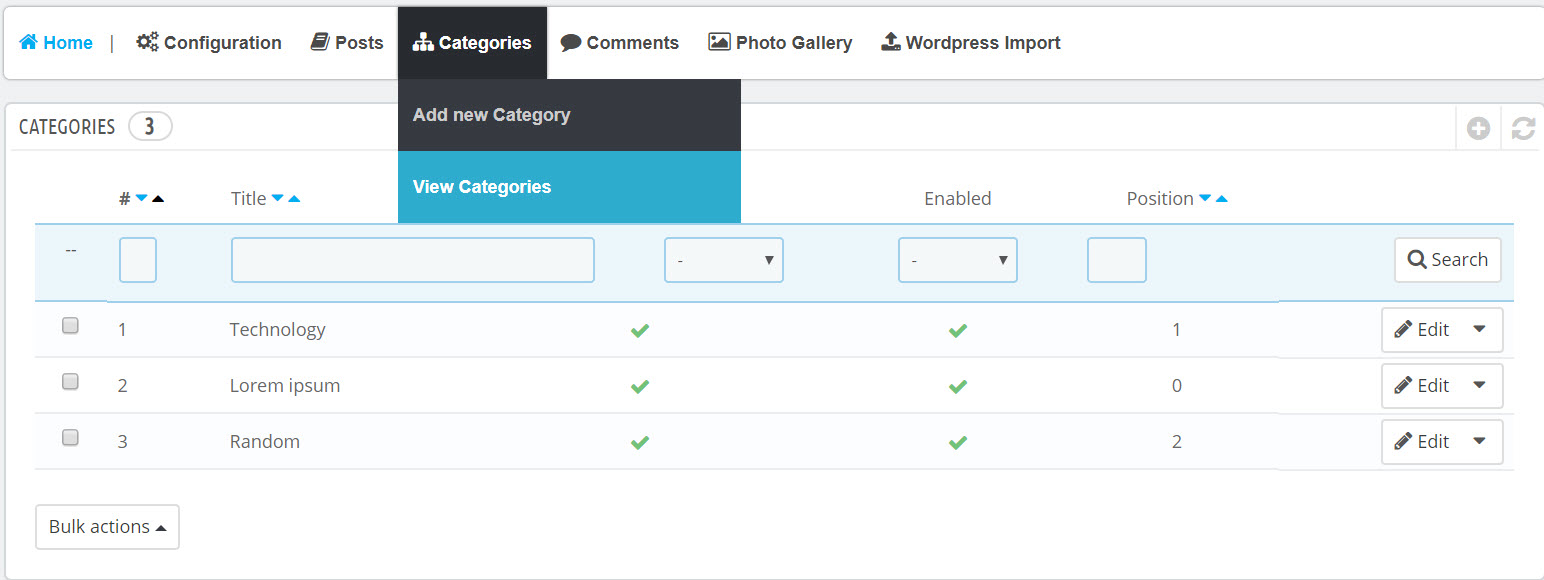
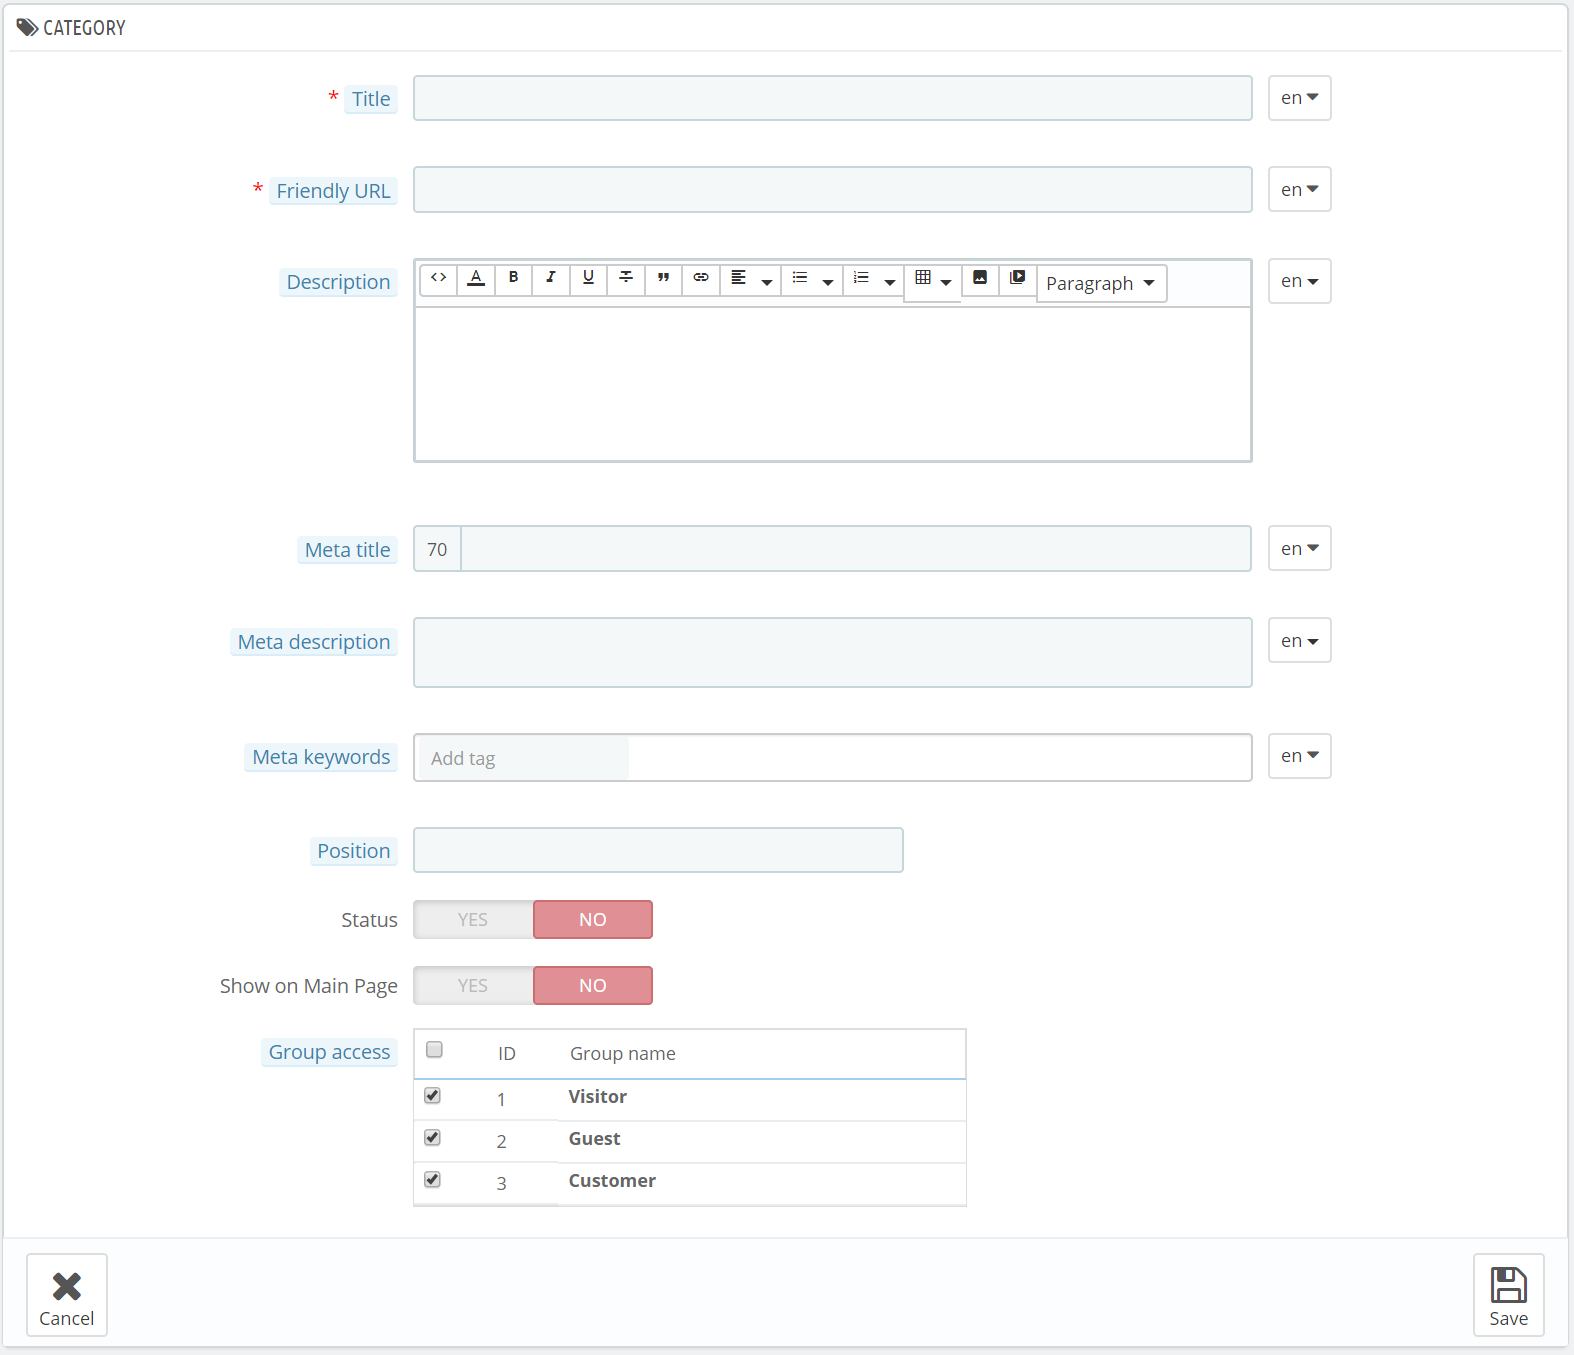
Step 6: Click ‘Add New’ to create a category. You can add a title, permalink, description, image, and Meta details to each category.
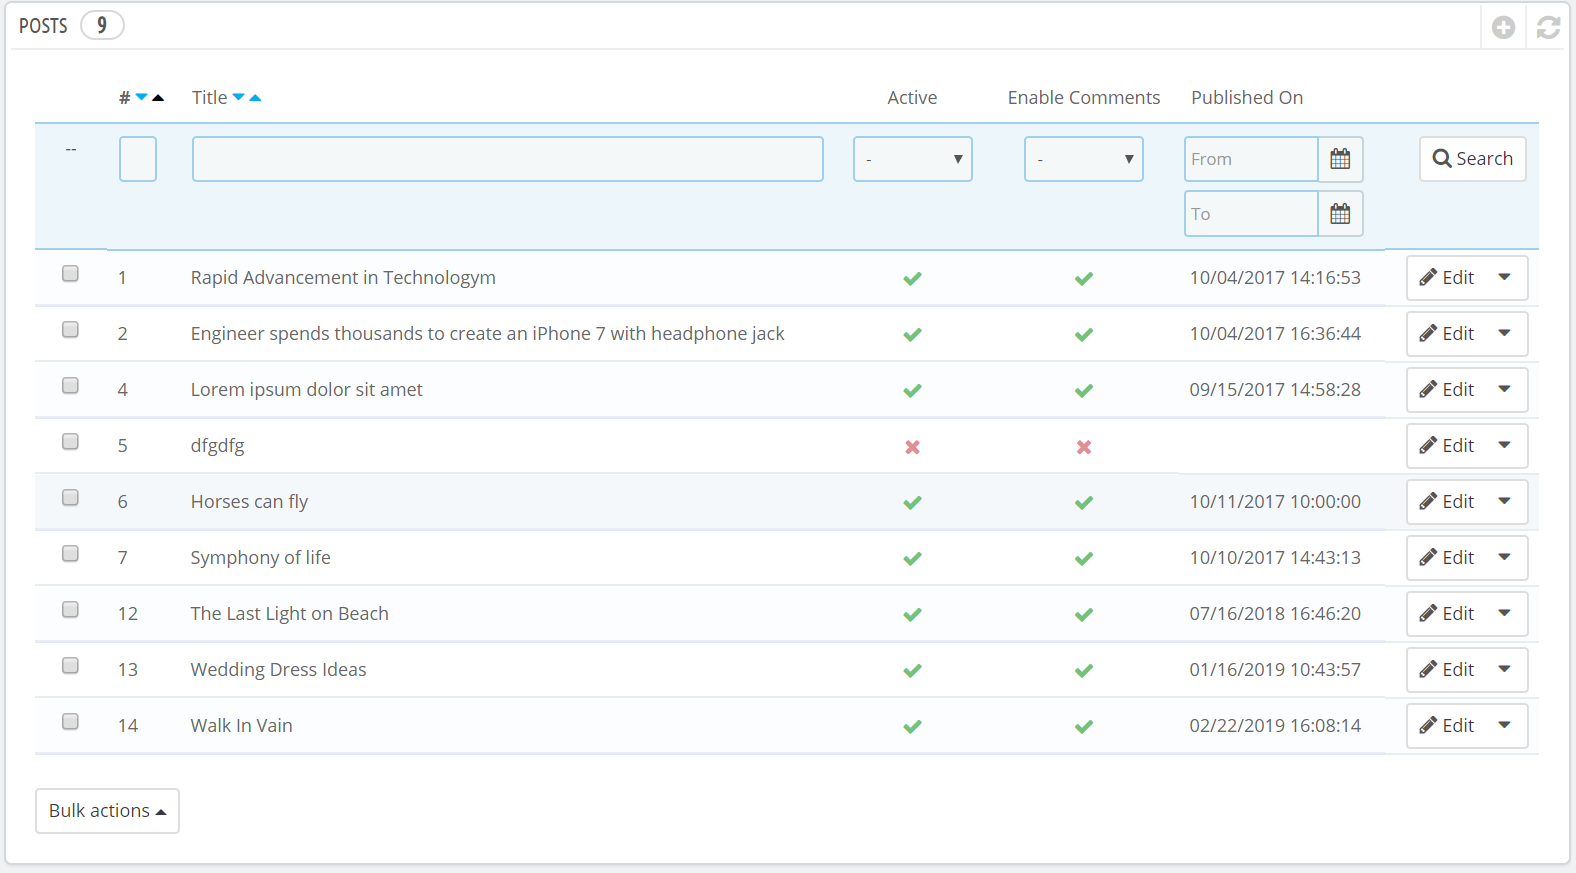
Step 7: After managing categories, click on Manage Posts from the Advance Blog tab menu. You will find a list of posts published on the website. Here, you can add, edit or delete a post.
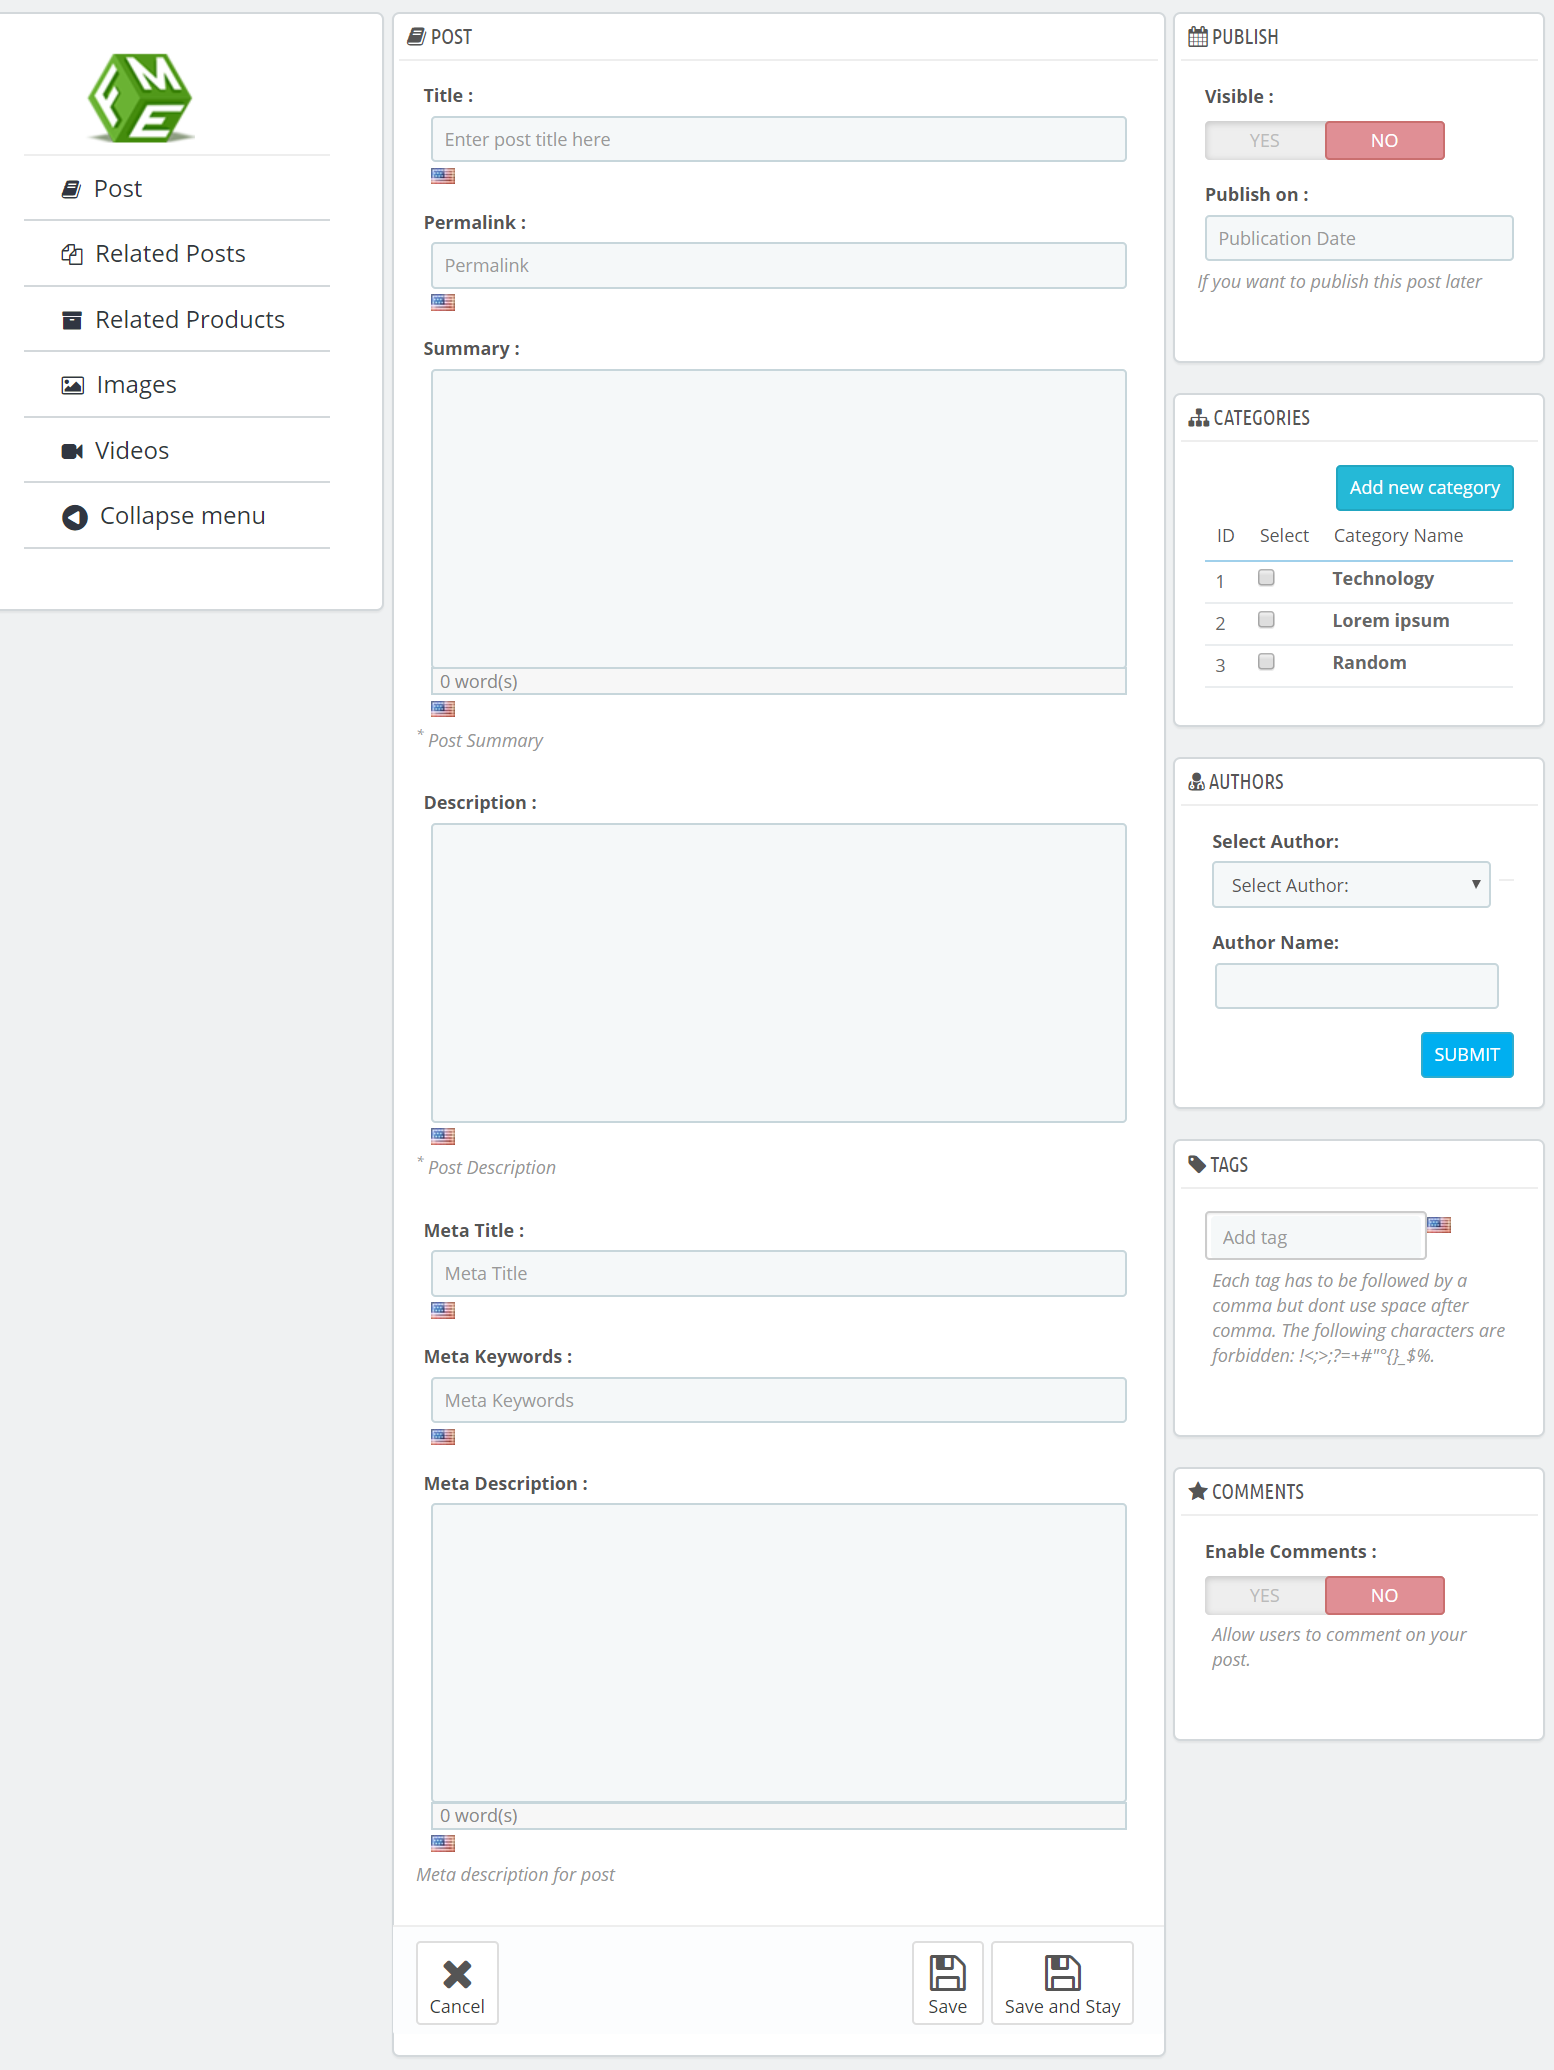
Step 8: You can add new posts by clicking the plus (+) sign. It will ask you to enter complete details including article title, permalink, summary, description, images, category, related products and related posts. Furthermore, you can add Meta details to each post to increase its ranking and online exposure.
Step 9:Now, move to the Manage Comments section from the Advance Blog tab, and you will see all the comments submitted against each article by customers.
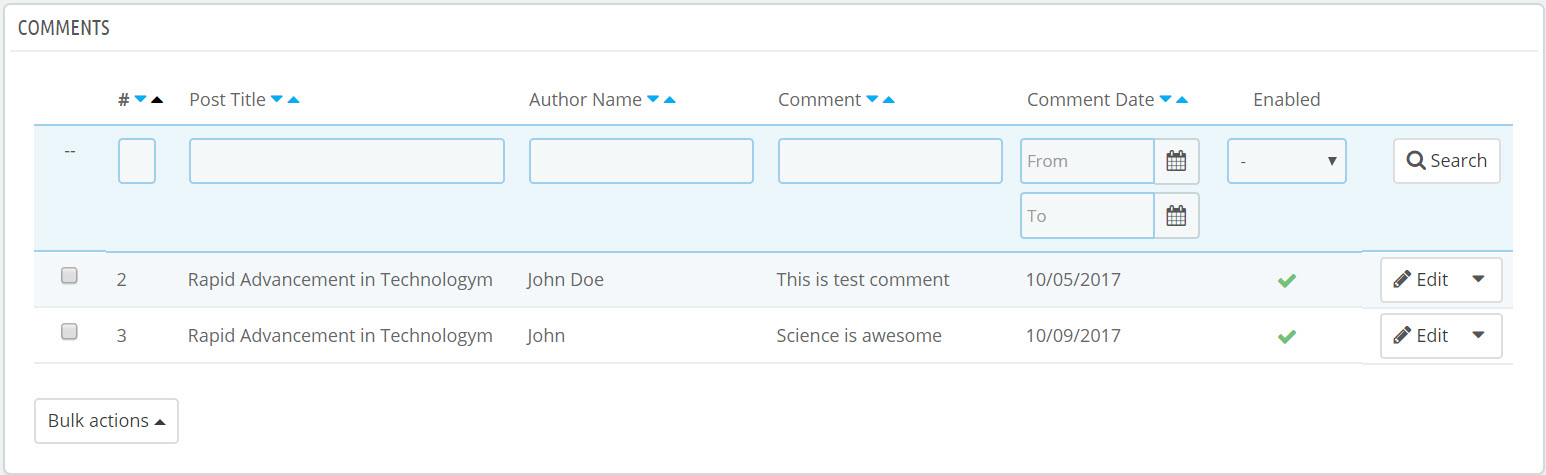
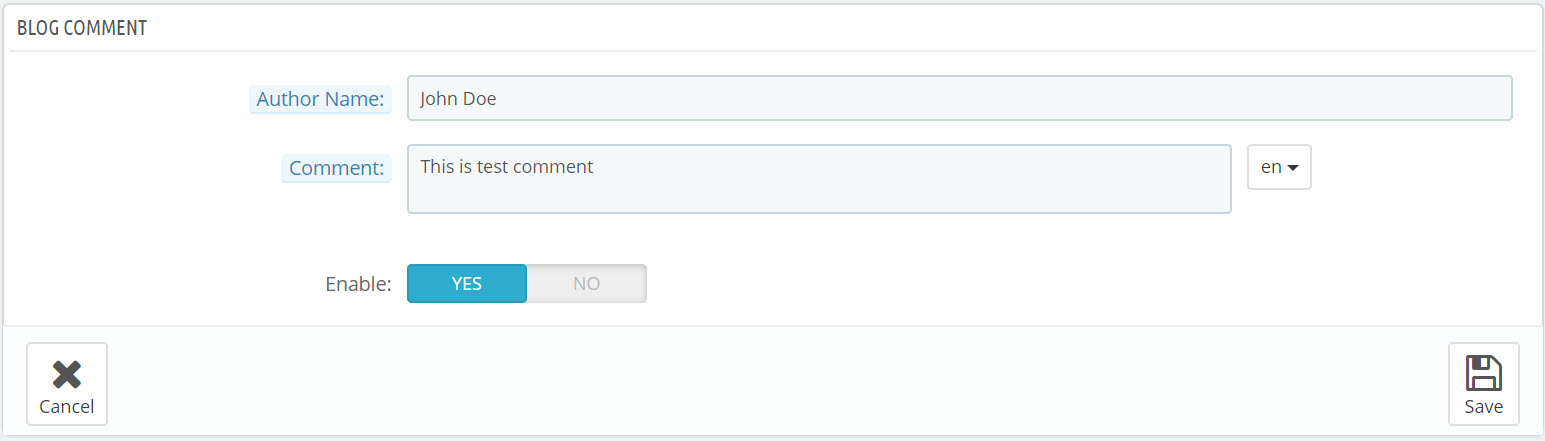
Step 11: Click on each comment, to edit or delete as it seems inappropriate. It helps you prevent spamming.
Step 12: After moderating comments, and managing posts and categories, you can view the front end. The landing page will look like this.
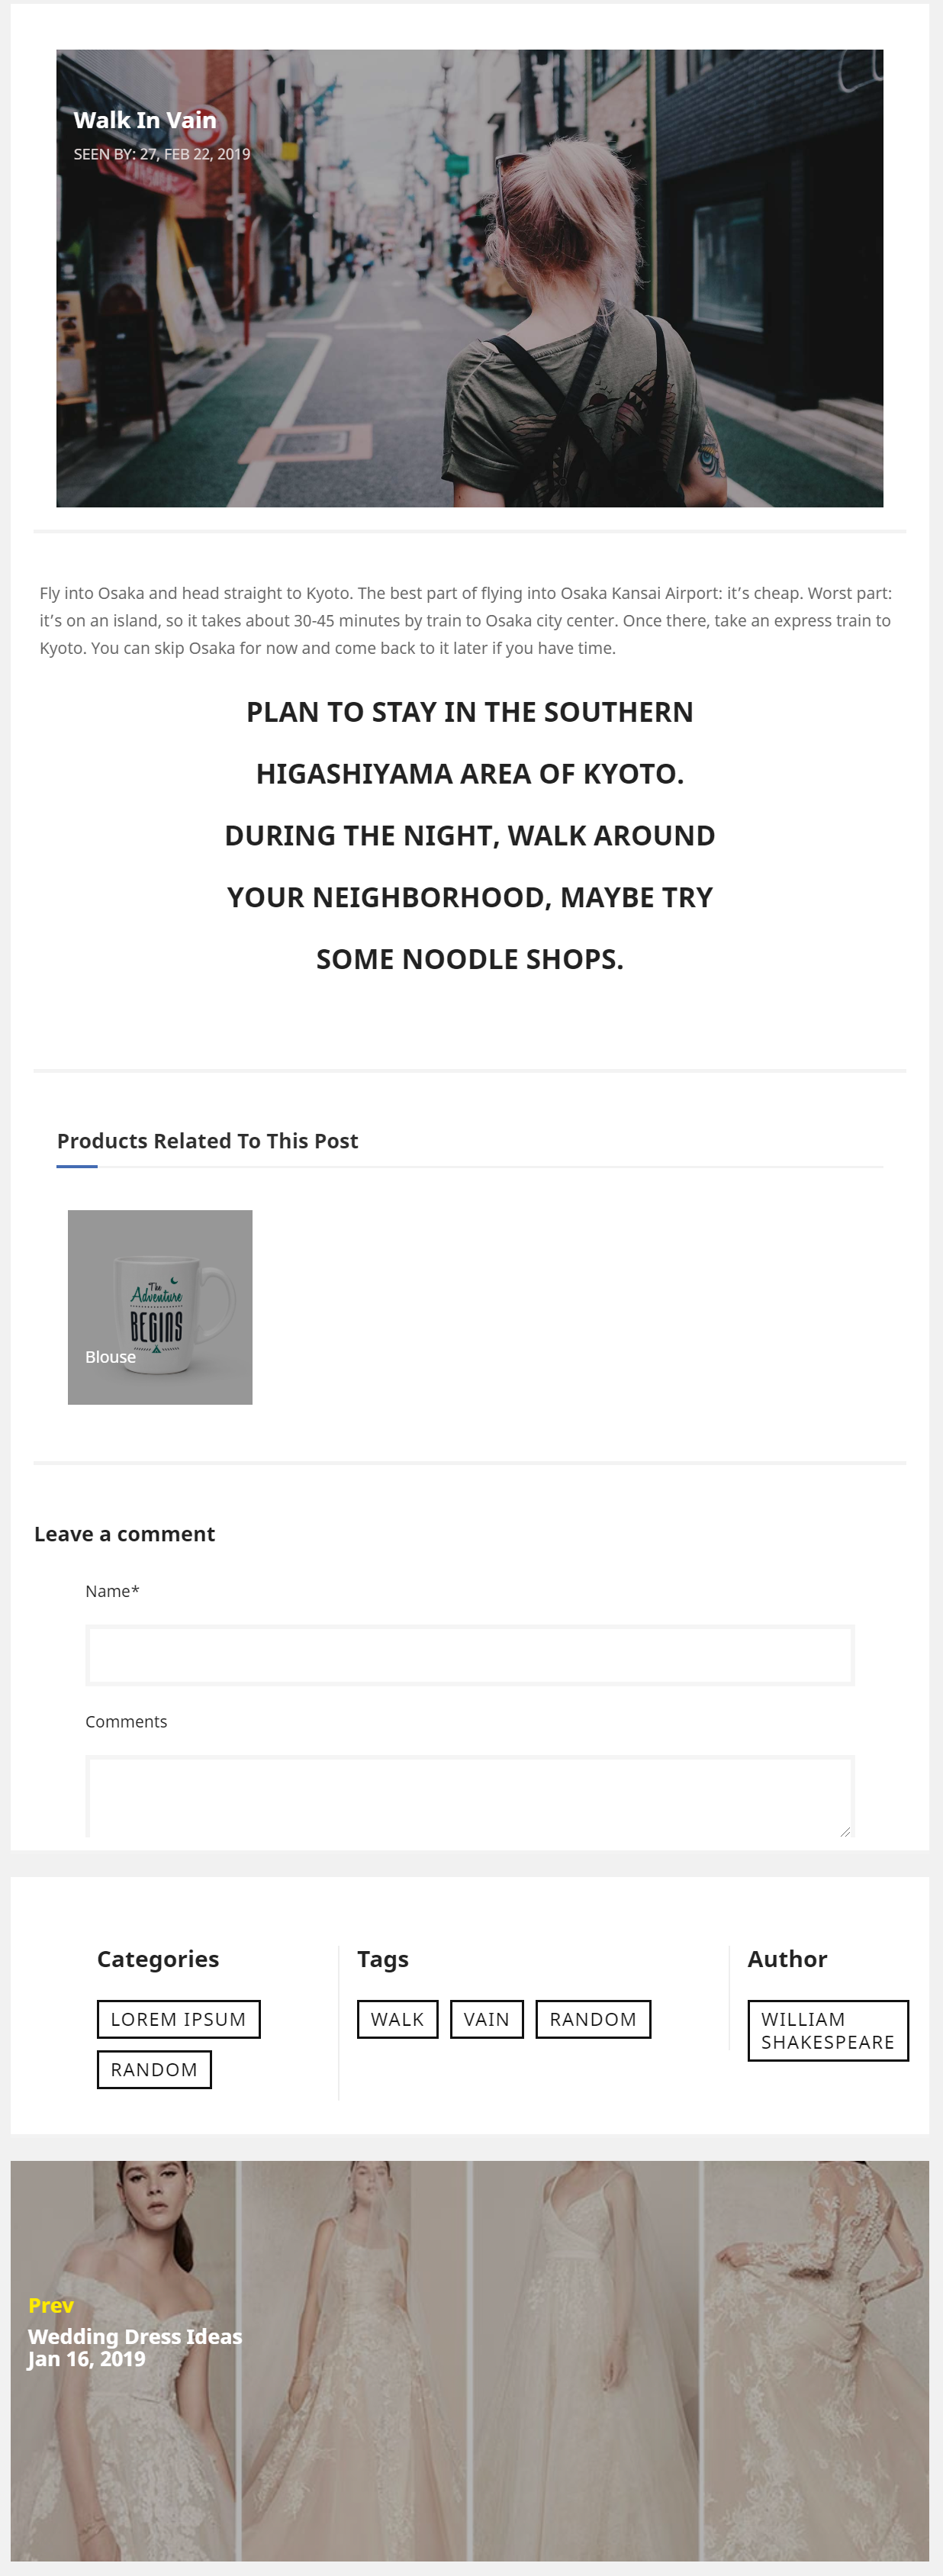
The PrestaShop module blog offers a complete set of tools to equip your PrestaShop powered online store with creative, artistic, engaging and entertaining content. It keeps you abreast with the trends of marketing, public relations, search engine optimization and customer support.