Search Blog
Recent Posts
-
 7 Essential Factors for...
This blog is all about guiding the readers to choose the right ecommerce shopping cart system for your stores. In...
Apr 19, 2024 Read more
7 Essential Factors for...
This blog is all about guiding the readers to choose the right ecommerce shopping cart system for your stores. In...
Apr 19, 2024 Read more -
 Crafting the Best...
This blog emphasizes the importance of SEO strategies in maximizing the success of e-commerce websites. The...
Apr 17, 2024 Read more
Crafting the Best...
This blog emphasizes the importance of SEO strategies in maximizing the success of e-commerce websites. The...
Apr 17, 2024 Read more -
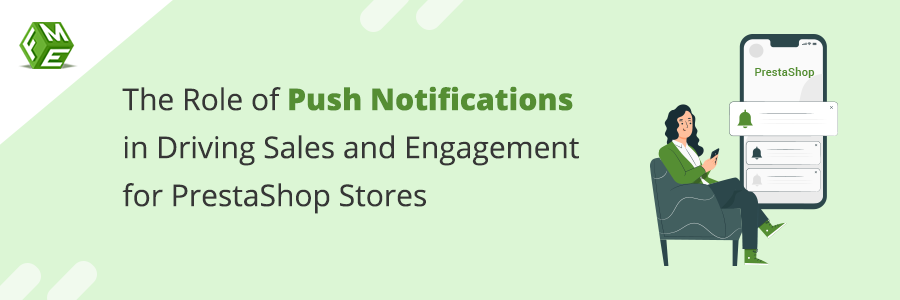 The Role of Push...
PrestaShop is a superhero for online stores, simplifying setup while emphasizing the importance of communication....
Mar 5, 2024 Read more
The Role of Push...
PrestaShop is a superhero for online stores, simplifying setup while emphasizing the importance of communication....
Mar 5, 2024 Read more -
 The Business Case for...
B2B modules are essential for businesses navigating the high-tech world of ecommerce. Serving as behind-the-scenes...
Feb 23, 2024 Read more
The Business Case for...
B2B modules are essential for businesses navigating the high-tech world of ecommerce. Serving as behind-the-scenes...
Feb 23, 2024 Read more -
 Improving Brand Loyalty:...
PrestaShop mobile app serve as superheroes, forging lasting connections beyond mere transactions, turning shopping...
Feb 16, 2024 Read more
Improving Brand Loyalty:...
PrestaShop mobile app serve as superheroes, forging lasting connections beyond mere transactions, turning shopping...
Feb 16, 2024 Read more

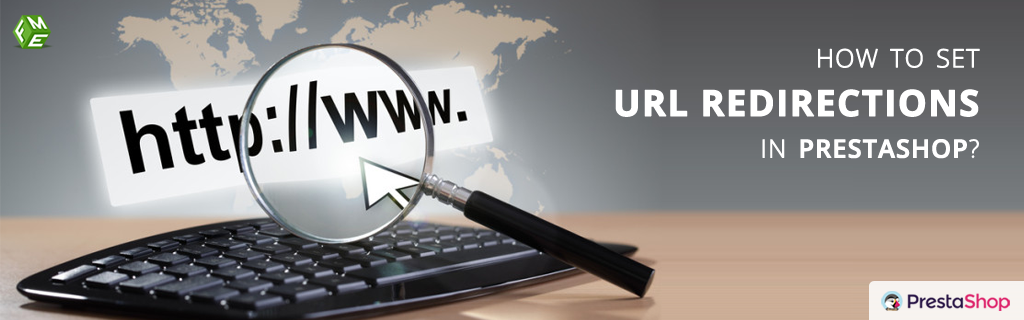
How to Set URL Redirections in PrestaShop?
Posted On: Sep 17, 2018
Categories: Prestashop SEO
The need to set URL redirections is felt when you have to modify link structures of you website. it mostly happens, when you migrate from an eCommerce platform to another, switch to another domain name, rebrand a company, or making the URLs search engine and
The URL is the link address of your website, and if it changes, you must link the newer one to assist the old customers just like the way you do in real life. A few redirections can be set manually by editing the .htaccess file of your store,
The FME's redirect PrestaShop Addon is also a combination of codes, but developed by expert and tested for extensive use for a flawless URL management of your store. It neither requires expert coding knowledge nor needs excessive configuration settings. Follow the tutorial below for a quick idea of how it works.
Step 1: Download and install the application, and activate it from your PrestaShop admin panel.

Step 2: After successful installation, you could find the PrestaShop redirect module in the left column of the backend. Click on it and you will see a list of URL redirections.
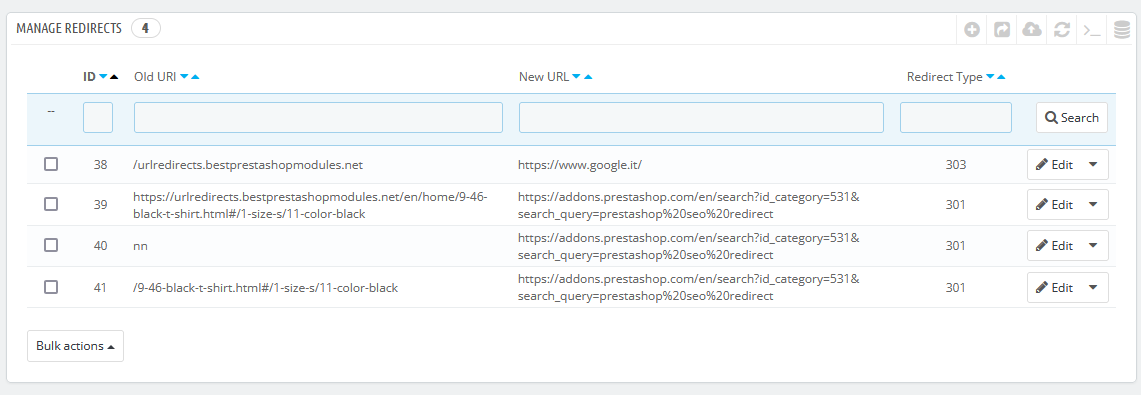
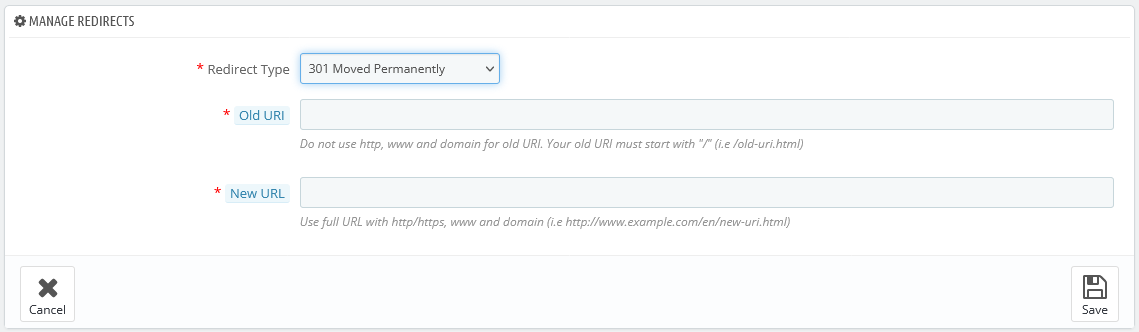
Step 3: By clicking on each listing, you can edit it and reset the redirections as well. You can select a redirection type from 301 Moved Permanently, 301 Moved Temporarily or 303 Other Source, which is followed by entering an old URL and a new one where you intend to redirect customers. Make sure you follow the url input guideline while entering urls.
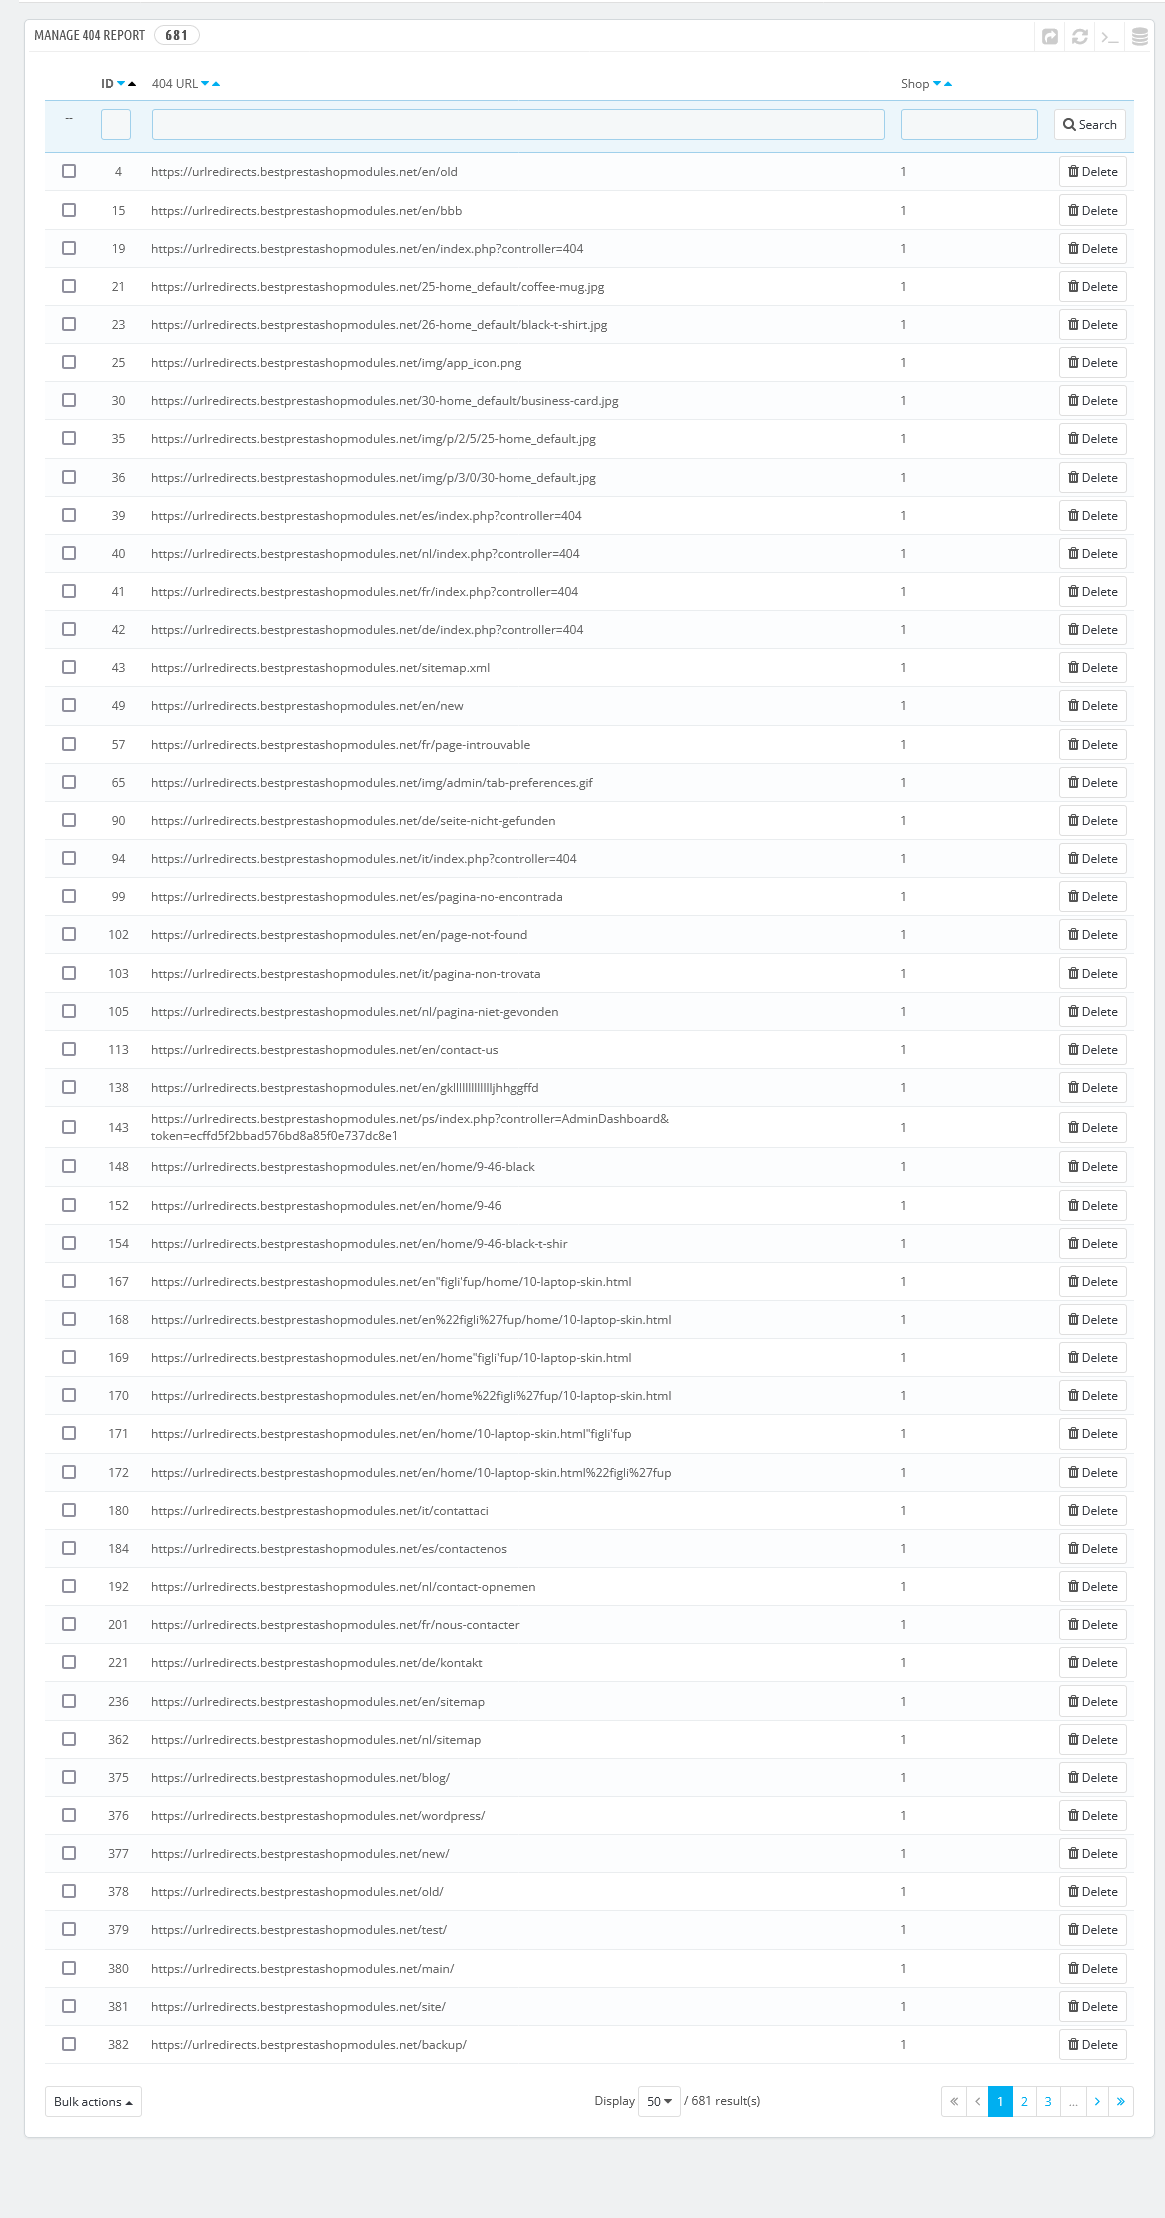
Step 4: You can manage the 404 report from here. Also you can delete the one you don't want.
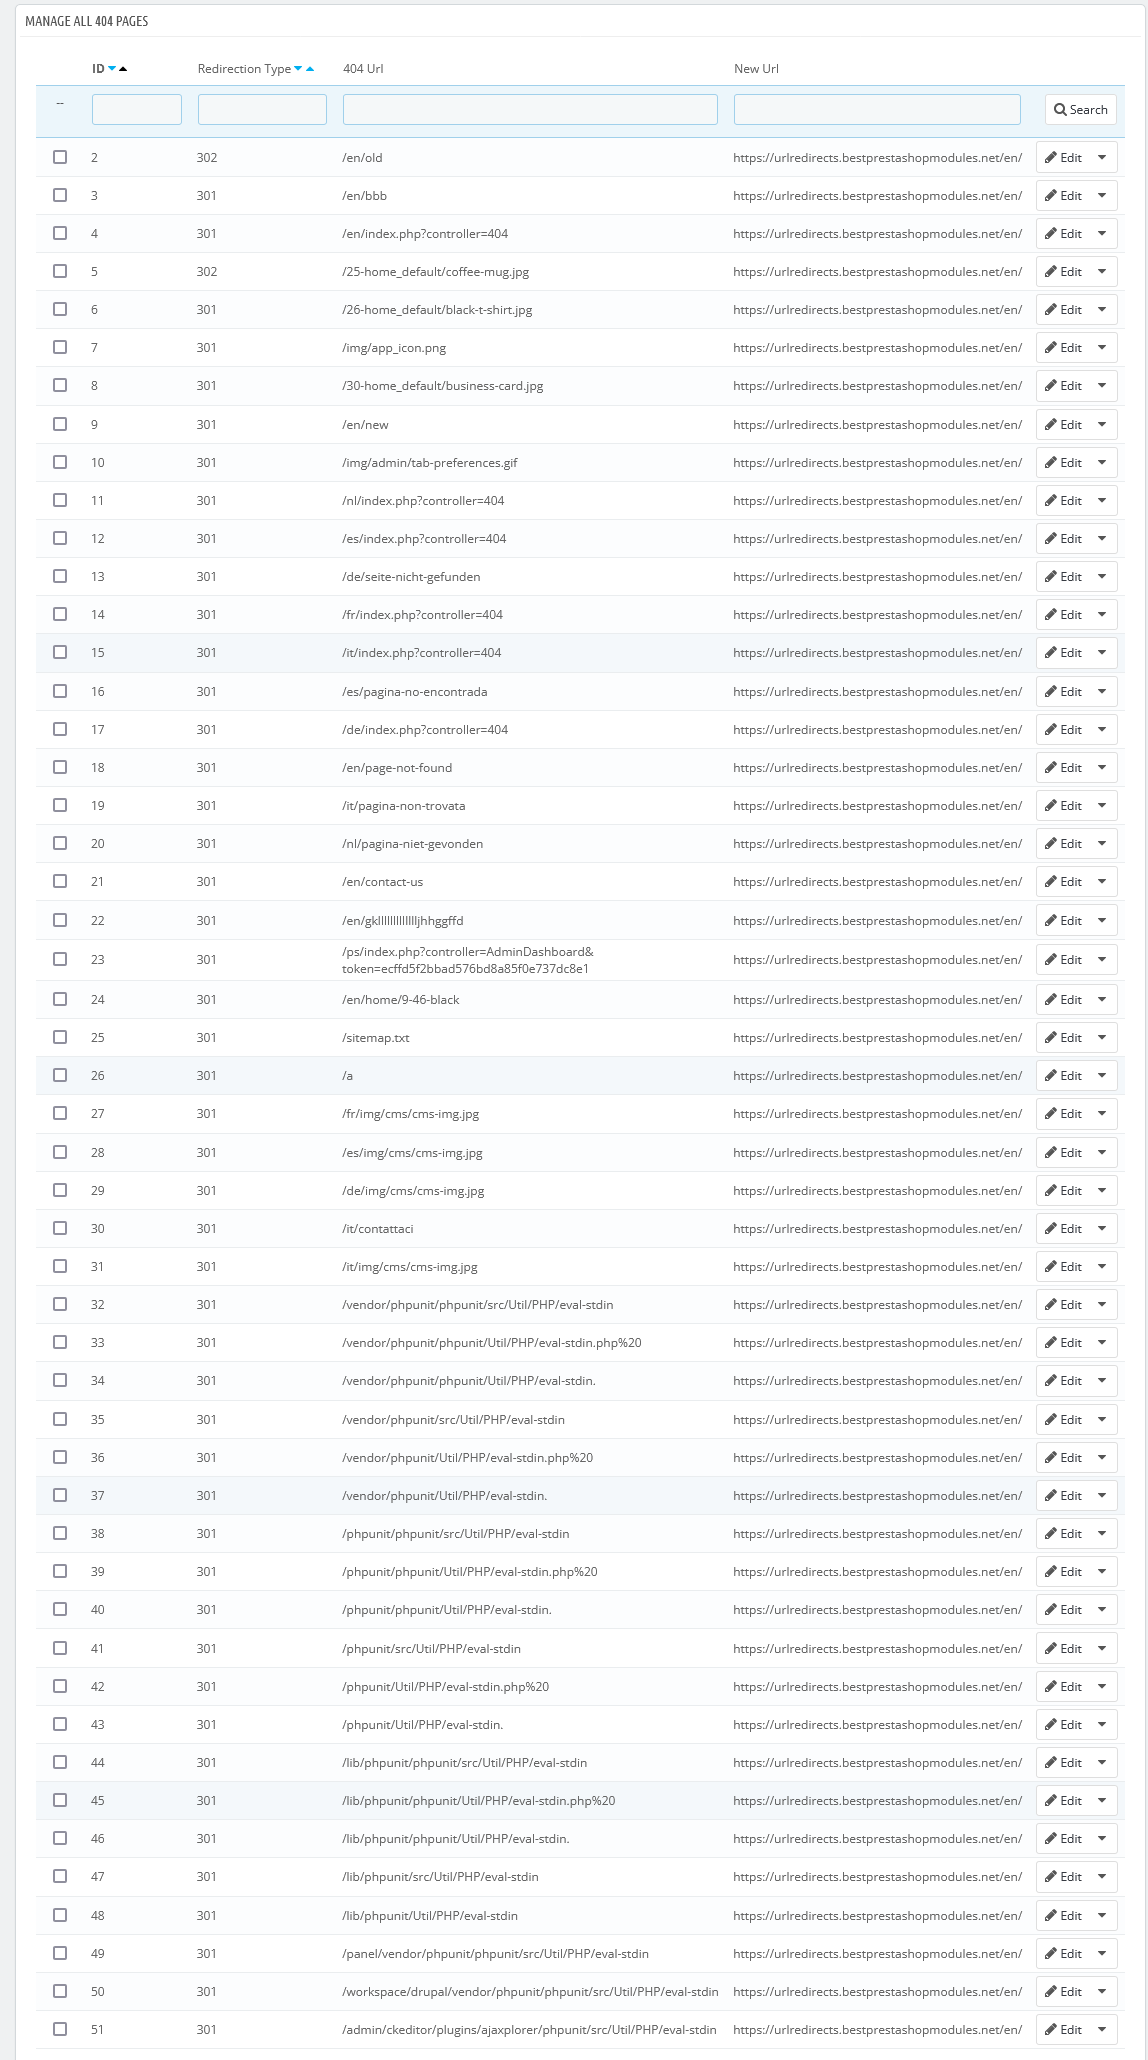
Step 5: You can also manage all 404 pages from the list. There is also an option to update all the pages at a time.
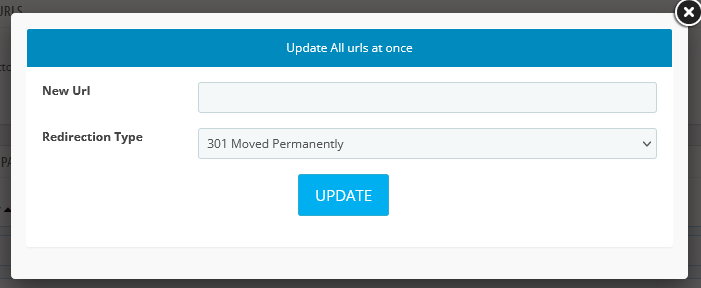
In order to update the pages at a time just click the Update All button, a popup will open from where you can set new URL and Redirection type.
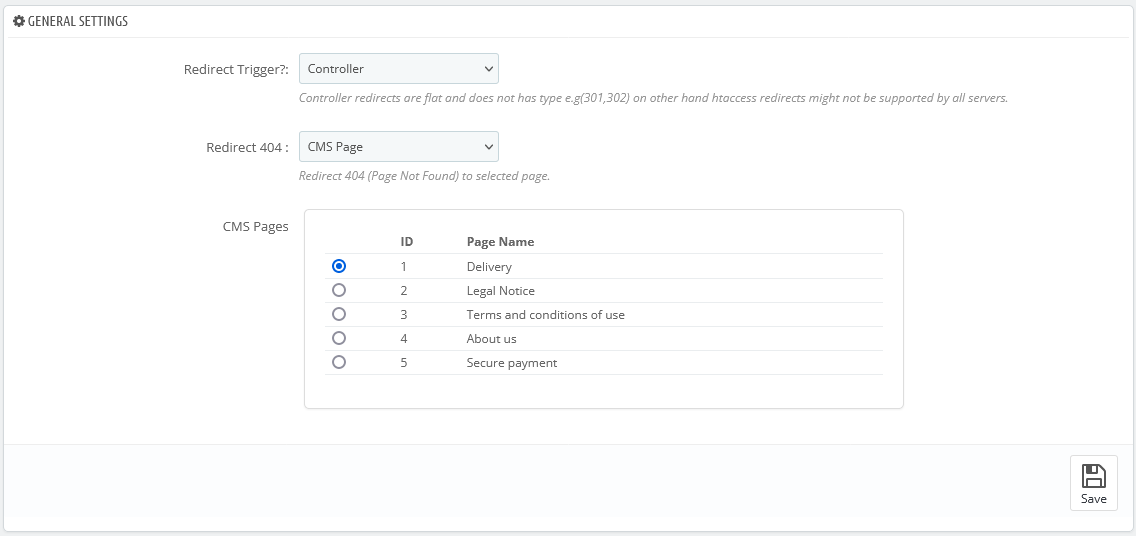
Step 7: For configuration settings, navigate to modules and click ‘Configure’ option against the URL Redirects module.
Step 8: The configuration settings will ask you about the redirect trigger and the 404 redirections. You can select either the home page or any CMS page in case of a ‘Page Not Found' Error.
This simple yet easy process using PrestaShop redirect url module will set you free from worrying about the SEO rankings, exposure, and traffic you expect to lose after modifying the URLs because the link juice of those URLs